
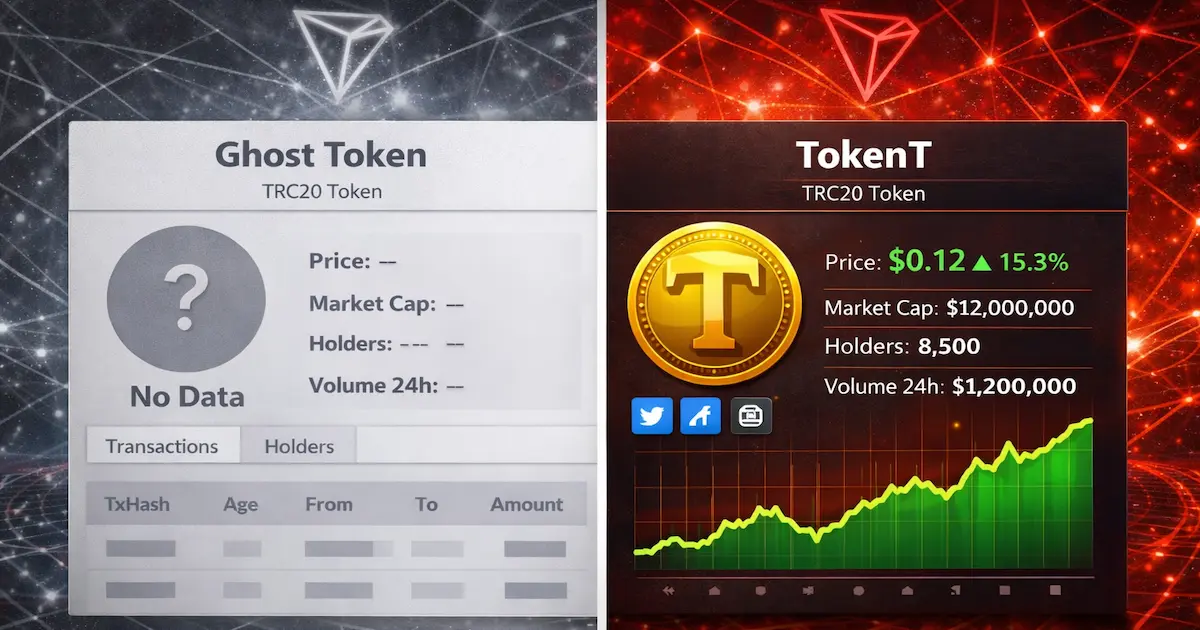
Launching a new cryptocurrency project is an exhilarating journey. You have deployed your smart contract, distributed your initial supply, and perhaps even started building a community. However, there is often one glaring issue that new founders face immediately after deployment. When you look up your project on the blockchain explorer, it looks incomplete. Specifically, it lacks a visual identity. Learning how to add token logo to TronScan is one of the first and most critical steps in transitioning your project from a raw smart contract into a reputable brand. Additionally, planning to integrate your TRC20 coin with major platforms is the logical next step for growth.
In the fast-paced world of Web3, perception is reality. A token that displays a generic placeholder image and lacks basic project information is often viewed with skepticism. Investors and users act quickly. If they cannot verify your website, social media links, or see a professional logo within seconds of searching your contract address, they may move on. Worse, they might mistake your legitimate project for a scam or a “throwaway” token.
This comprehensive guide will walk you through exactly how to list your TRC20 token logo and price on TronScan. We will cover everything from connecting your issuer wallet and navigating the “Update Token Basic Info” menu to understanding the specific TronScan token logo requirements. By the end of this article, you will have a fully optimized presence on the Tron network’s leading explorer.
Why a Complete TronScan Profile Matters
Before we dive into the technical steps, it is essential to understand the value of this process. Your TronScan profile acts as the definitive resume for your crypto asset. When users hold your token in wallets like TronLink, the logo and price data displayed there are often pulled directly from TronScan’s database. Furthermore, you can follow a specific guide to ensure your TRC20 asset is visible on TronLink directly.
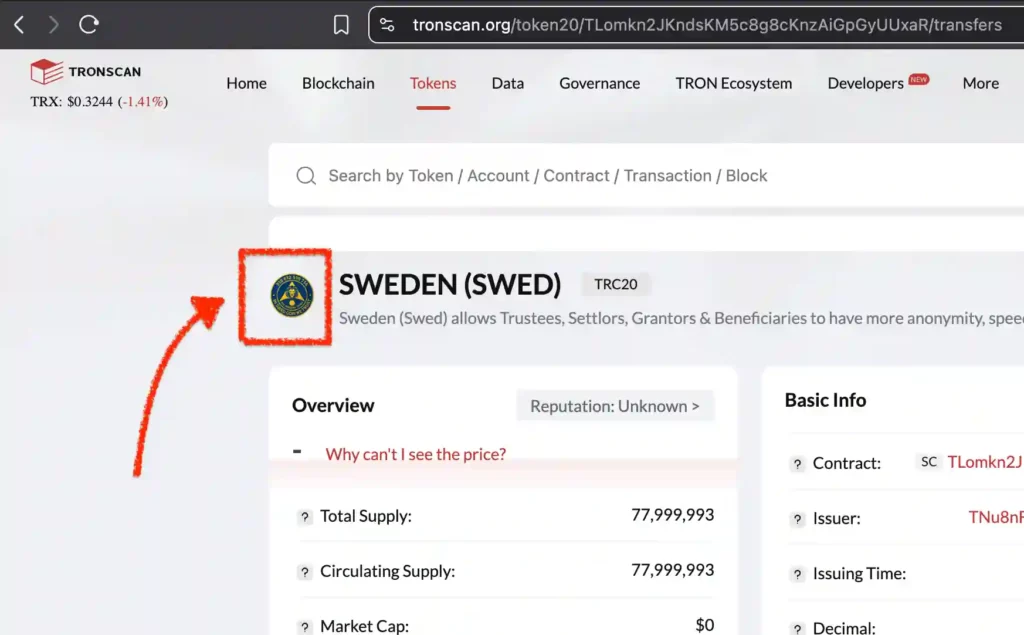
If you do not upload TRC20 logo to TronScan, your users will likely see a blank circle or a generated identicon in their wallets. This lacks professional polish. Furthermore, updating your token information allows you to link your official website, whitepaper, and social channels directly to the contract page. This creates a loop of trust. A user finds the contract, clicks the official link to your site, and feels confident they are interacting with the genuine project rather than a copycat. Moreover, this visual gap often extends to other apps, making it vital to add your asset to Trust Wallet as well.
The Connection Between Data and Price
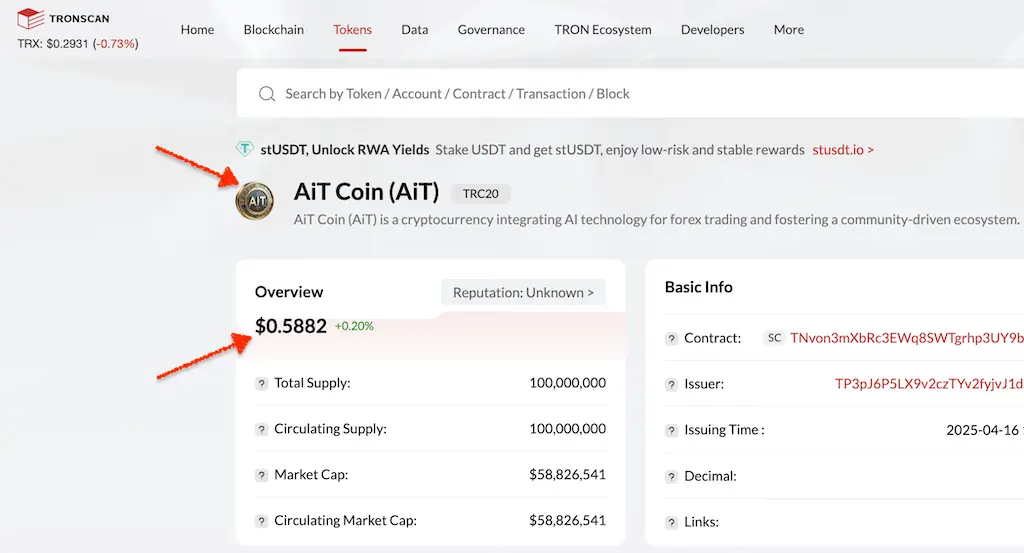
It is not just about aesthetics. It is also about financial data. Many new founders wonder why their token price does not appear on the explorer even after trading begins. TronScan has specific criteria for displaying price feeds, often involving liquidity on SunSwap or listings on major aggregators like CoinGecko. We will explore how to ensure your token has a reliable market price source later in this guide.
What is Tronscan?
TronScan is the official blockchain explorer for the TRON blockchain. It acts as a search engine and dashboard, giving users real‑time visibility into the network’s blocks, transactions, accounts and smart contracts. Beyond simply tracking transfers, TronScan offers a built‑in wallet interface where users can manage TRX and tokens, issue new tokens and deploy smart contracts, and even participate in governance by staking and voting.
Launched in 2018, TronScan serves as the reference tool for developers, investors and traders to verify transaction status, inspect contract code and analyze network statistics. Its transparency and analytical capabilities have made it an essential portal for anyone working with the TRON ecosystem, supporting decentralized applications (DApps) and promoting community engagement.
Prerequisites: Before You Start
To successfully update token basic info TronScan, you must have control over the specific wallet address that deployed the contract. TronScan restricts edits to the token owner for security reasons. This prevents malicious actors from altering the details of a project they do not own.
Ensure you have the following ready:
- The Issuer Wallet: Access to the wallet address that created the TRC20 contract.
- TronLink Wallet: Installed on your browser or mobile device to sign the verification message.
- Project Assets: A square logo image meeting the TronScan logo size 100×100 requirement, your official website URL, and social media links.
- Email Access: A domain-specific email address (e.g., [email protected]) is highly recommended for faster approval.
Step 1: Connect as Token Issuer on TronScan
The journey to a professional listing begins with proving your identity. You cannot simply submit a form as a guest. You must authenticate your ownership of the contract on-chain.
Start by navigating to the official TronScan website. Log in using the wallet address that issued the token. The most seamless way to do this is via the TronLink extension. Once you are logged in, search for your token’s contract address in the main search bar to pull up your token’s profile page.
locating the Update Menu
On your token’s page, look for the menu options. Depending on the current UI layout, you will find a “Feedback” or “More” menu button. Click this to reveal a dropdown list. From there, select “Update Token Basic Info.”
This is the gateway to managing your asset’s reputation. If you are logged in with a wallet that is not the issuer, you may be blocked from proceeding or the changes will not apply. TronScan will verify your permissions instantly. Once you select the update option, the system will prompt you to connect your wallet if it has disconnected. Confirm the connection to proceed to the submission form.
Step 2: Submit the Token Logo and Metadata
Once your wallet is connected and verified as the issuer, TronScan will open the official “Update Token” form. This is where the magic happens. You will input all the data that transforms your page from a raw contract view into a branded product page.
You will see several fields. Some are editable, while others are fixed by the blockchain. It is vital to understand that fields like Token Name, Symbol, Total Supply, Decimals, and Contract Address cannot be changed here. TronScan pulls those directly from the blockchain data. They are immutable once deployed. If you made a typo in your token name during deployment, you would need to deploy a new contract to fix it. This form is strictly for the off-chain metadata that sits on top of the blockchain data.
In addition, projects comparing explorer metadata requirements can use this guide to adding a token logo on Robinhood Chain to prepare the correct ownership evidence, asset URL, and review package.
Writing a Compelling Description
One of the first fields you will tackle is the Token Description. This is a concise summary of your project. You have limited character space, so clarity is king. Avoid fluff. State the purpose of the token, the utility it provides, and the ecosystem it supports.
Keep the description under 200 characters if possible. Users scanning the explorer rarely read long paragraphs. They want to know what your token does at a glance. For example, instead of saying “This is a revolutionary decentralized asset for the future of finance,” say “Governance token for the XYZ DEX, allowing holders to vote on liquidity pool parameters.”
Linking Your Digital Ecosystem
The “Project Links” section is crucial for TronScan project links on token page visibility. You will have fields for your official website URL, whitepaper link, and social media channels like Twitter, Telegram, and GitHub.
Do not skip this. Providing these links lends immense credibility. It helps users find your community and verifies that the contract they are looking at is indeed the one associated with your website. Broken or missing links can be a red flag for compliance teams at exchanges and wallets.
The Importance of a Domain Email
You will be asked to provide a “Contact Email.” This is for TronScan’s internal use to contact you if there are issues with your listing. While you might be tempted to use a generic Gmail or Yahoo address, using a domain email (e.g., [email protected]) is highly recommended.
Using a custom domain email signals that you are a legitimate entity with a functioning website and infrastructure. It increases trust and can significantly speed up the approval process. It shows the reviewers that you are not a fly-by-night operation.
TronScan Token Logo Requirements
Now, we arrive at the visual core of the process: the logo upload. Many submissions get rejected because they fail to adhere to the strict TronScan token logo requirements.
Here is what you need to prepare:
- File Format: PNG or JPG/JPEG.
- Dimensions: TronScan logo size 100×100 pixels.
- File Size: Under 200 KB.
- Composition: A clear, square image.
Because this logo will appear in various places, including mobile wallets, transaction histories, and thumbnail lists. It must be recognizable at a very small size. Avoid complex illustrations with tiny text. A bold, simple icon usually works best. If your logo is circular, ensure it is centered within the square canvas with a transparent background (if using PNG) or a solid background that matches your brand.
Finalizing the Submission
After filling in the description, links, email, and uploading the logo, review everything. Accuracy is critical. When you are ready, click “Next” or “Submit.”
TronScan will prompt you to sign a message with your wallet. This is a crucial security step. The signature proves you are the owner of the private key associated with the issuer wallet. Note that this is an off-chain signature. It does not cost any TRX (bandwidth or energy) and does not execute a transaction on the blockchain. It is simply a cryptographic verification.
Once signed, you will see a success notification indicating your request is pending.
The Review Process
Your job is done for the moment, but the process is not over. The update goes into a pending review state. The TronScan team manually reviews these submissions. They check if the links are valid, if the content is appropriate, and if the logo meets the TronScan logo square image guidelines.
This review typically takes a few business days. TronScan notes that due to high volumes, it can take up to 5 business days. Be patient. Once approved, your token’s page will automatically update, and wallets like TronLink will begin to pull the new data.
Step 3: Ensure Your Token Has a Visible Price
A logo makes your token look real, but a price makes it look valuable. You might notice that even after your logo is approved, the price section on TronScan might say “—” or “$0.00.”
TronScan does not magically know what your token is worth. It needs a reliable source of market data. According to official documentation, a TRC20 token’s price will automatically display if specific conditions are met regarding market listings.
Integration with Major Trackers
The most direct way to get a price displayed is to get listed on major price trackers. For instance, you should prioritize efforts to submit your project to CoinGecko to establish a credible price feed. If your token is listed on CoinGecko or CoinMarketCap with a valid price feed, TronScan can fetch that data. Also, expanding your presence by learning how to list on CoinCodex can provide an alternative data source.
TronScan integrates with these APIs. However, getting listed on CoinMarketCap or CoinGecko is a hurdle in itself. These platforms have strict listing requirements, often demanding significant trading volume, community size, and historical data. Therefore, knowing the right strategies to get listed on CoinMarketCap quickly can save you months of waiting. Also, do not limit yourself; there are other free coin trackers that can also boost your online visibility.
The SunSwap Route
For newer projects, the most accessible route is often through the Tron ecosystem’s native decentralized exchange (DEX). TronScan checks if the token is actively traded on SunSwap (v1, v2, or v3).
They specifically look for healthy liquidity. A common benchmark mentioned in the industry is a liquidity pool value greater than $100,000, combined with steady trading volume. If your token has a liquid pool on SunSwap (paired with TRX or USDT) and regular trading activity, TronScan can derive a price from that on-chain market data.
Action Plan for Price Visibility
To ensure your price shows up, you need to establish a real market:
- List on SunSwap: Create a liquidity pool. Pair your token with a major asset like TRX or USDT.
- Provide Liquidity: A pool with $50 of liquidity is too volatile to be a reliable price source. Aim for substantial liquidity (e.g., targeting that $100k mark if feasible) to stabilize the price. Besides, you might consider services that assist with managing liquidity for tracker listings if you lack capital.
- Encourage Volume: A stagnant pool won’t generate a price feed. You need active trades. Consistent daily volume signals to TronScan that the market is alive.
- Exchange Listings: While SunSwap is great, listing on centralized exchanges (CEX) adds more data points. When multiple markets show a consistent price, data aggregators trust the asset more. In addition, you can list your token on the Tokpie exchange to gain an additional reliable price reference.
Once you meet these criteria (listing on CMC/CG or active SunSwap market), TronScan’s system usually updates automatically. It may take a few data refresh cycles, but the price, 24-hour change, and market cap should eventually appear.
Step 4: Troubleshooting Price Display
Sometimes, you do everything right, and the price still does not show. You have liquidity on SunSwap, you are trading actively, but the TronScan page remains blank regarding value.
In this case, you can force the issue by submitting a manual request. TronScan provides a “Submit Token Price Info” feedback form. You can usually find a link near the missing price area that asks, “Why can’t I see the price?” clicking this will lead you to the contact form. Alternatively, navigate to the “More” menu and select “Submit Token Price Info.”
Filling the Price Request Form
You will need to log in with a TronScan account (distinct from your wallet connection). In the form, provide evidence of your market. This includes:
- CoinGecko/CoinMarketCap listing URLs (if applicable).
- Your contract address.
- Details about your SunSwap pair (pair address, current liquidity, volume).
The team will review this request, typically within 5 business days. During this waiting period, ensure your liquidity does not drop significantly. They need to verify the price source is reliable and not easily manipulated.
Step 5: Managing Reputation and Security Tags
A verified contract and a logo are great, but they can be undermined if your token is tagged as “Unknown” or, worse, “Unsafe.”
TronScan implements a reputation system. New tokens often start as “Unknown.” However, if your token name includes keywords like “TRX,” “Tron,” “USDT,” or “Elon,” automated filters might flag it as “Suspicious” to protect users from impersonation scams.
Removing the “Unsafe” Tag
If you find your legitimate project has been flagged, do not panic. You can request a manual review via the “Update Token Rating” option under the Feedback menu.
Explain your project clearly. Describe your utility, your team, and why your name is legitimate. Using that official domain email we mentioned earlier is crucial here. If the team is convinced, they can adjust your reputation to “Neutral” or “OK.” This removes the red warning banners and increases user confidence. Furthermore, you can build further authority if you get your currency on CoinCheckup alongside your explorer update.
Verify Your Contract Code
Before you even start the logo update, you should ensure your contract source code is verified. A verified contract displays a green checkmark badge. This proves the code on the blockchain matches the source code you claim to have written. It is a baseline requirement for transparency. While not strictly part of the logo upload form, a verified contract boosts your credibility during the review process for both the logo and reputation tags. Additionally, securing a report from reputable smart contract audit firms will further enhance your security badge.
Developer Option: The GitHub Route
For teams that prefer a more technical approach or version control, TronScan maintains a public GitHub repository known as the “tron-tvc-list.”
This repository stores token data in JSON format. Developers can fork this repo, add their token details (logo URL, website, contract address) to the JSON file following the schema, and submit a Pull Request (PR).
This method accomplishes the same goal as the web form but offers transparency. You can see exactly when the PR is merged. If you choose this route, you must host your logo image on a stable URL (like IPFS or your project domain) so the JSON file can reference it. For most founders, the web form described in Step 2 is simpler and faster, but the GitHub option remains a powerful alternative for those comfortable with code.
Conclusion
Your presence on the blockchain explorer is often the first impression investors have of your project. Leaving it blank is akin to launching a website with “Lorem Ipsum” text still on the homepage. By taking the time to connect issuer wallet to TronScan, submit high-quality metadata, and establish a healthy market on SunSwap, you signal to the world that your project is here to stay.
Remember, this process is about more than just a JPEG. It is about verification, reputation, and data accuracy. A token with a logo, a visible price, and verified social links stands out in a sea of anonymous contracts. Follow the steps outlined in this guide, respect the TronScan logo requirements, and you will have taken a significant step toward building a trustworthy Web3 brand. Finally, to maintain this momentum, you should explore comprehensive strategies on how to build a successful cryptocurrency project.
FAQ
Q: Why is my token logo not showing on TronScan after I submitted it? A: Updates are not instant. All submissions go through a manual review process by the TronScan team, which can take up to 5 business days. Also, ensure your browser cache is cleared, as sometimes old data lingers locally.
Q: What are the strict TronScan token logo requirements? A: You must upload a square image, 100×100 pixels in size, in either PNG or JPG format. The file size must be under 200 KB. Images that do not meet these specs are often rejected or fail to upload.
Q: Can I update the token logo if I lost the issuer wallet? A: No. TronScan restricts token information updates strictly to the wallet address that deployed the contract. If you lose access to the issuer keys, you cannot update the profile via the web form.
Q: How much liquidity do I need on SunSwap for the price to show on TronScan? A: While there is no hard-coded minimum, TronScan looks for “healthy liquidity” to ensure the price is accurate. A common target is a pool value of over $100,000 with consistent daily trading volume. Pools with very low liquidity are considered unreliable price sources.
Q: Does uploading a logo cost transaction fees? A: No. When you sign the message to confirm your update request, it is an off-chain signature. It verifies your ownership without executing a transaction on the TRON blockchain, so it consumes no bandwidth or energy.
Q: Can I change my Token Name or Symbol using the update form? A: No. The Token Name and Symbol are defined in the smart contract code upon deployment. They are immutable on the blockchain. The update form only allows you to change off-chain metadata like the logo, description, website link, and social media URLs.