Who this is for: founders and solo builders launching a new token or stablecoin who need wallet visibility fast. If you’re wondering how to add a token to Coinbase Wallet so the app recognizes your asset, shows your logo and USD price, and makes it easy to swap, you’re in the right place. In 2025, Coinbase Wallet rebranded to the Base app, but it remains a self‑custody wallet with the same core features. It supports Ethereum, Solana, and EVM networks (plus BTC/DOGE/LTC on mobile), so your ERC‑20 or Base token can work on day one—no centralized‑exchange listing required. Additionally, founders planning a dollar‑pegged asset can follow a practical stablecoin build guide to meet wallet‑readiness expectations.
What You’re Actually Doing (and Why It Matters Now)
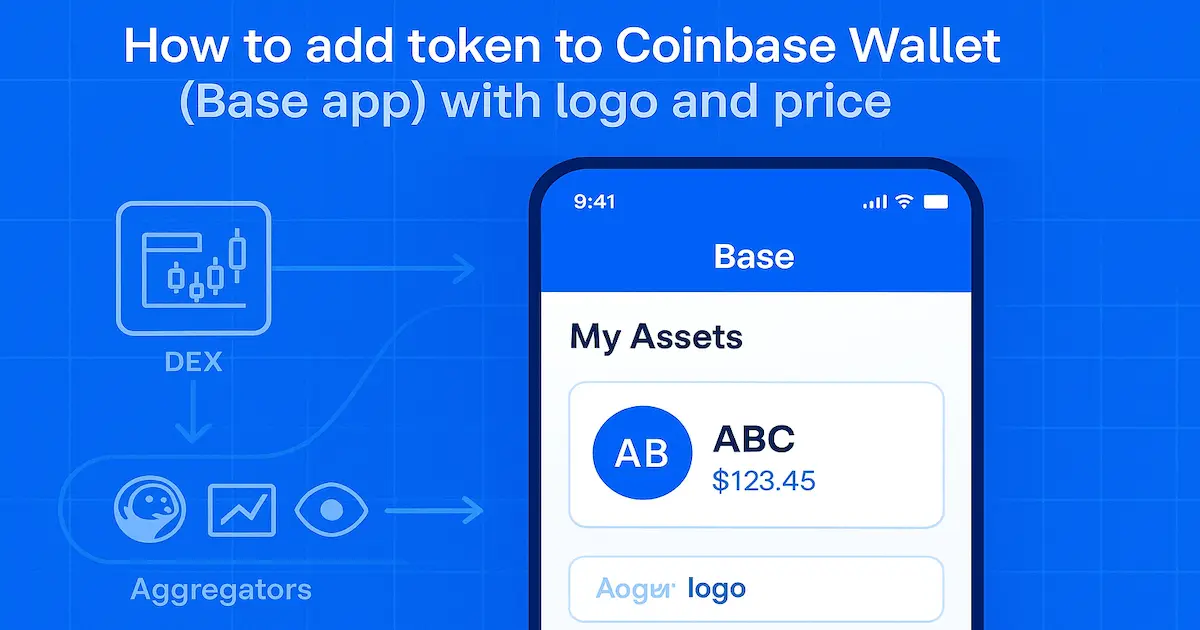
You’re not listed on Coinbase Exchange. You’re syncing your token’s metadata and price into the Base app’s asset catalog so users can find, track, and swap it. The wallet pulls names and logos from Birdeye, CoinGecko, and CoinMarketCap, and lets issuers submit a logo/description update from the token page on wallet.coinbase.com, typically reviewed in ~5 business days. In practice, once aggregators track your market, the wallet’s details and price usually appear after a short delay (~24–48 hours). Therefore, review free Coinbase asset‑page listing steps to understand how cataloging relies on CMC data. We’ll show you how to seed DEX liquidity, apply to aggregators, and push a manual update when needed.
A 72‑Hour Win: Micro Case Study
A stablecoin team deployed an ERC‑20 on Base, seeded $30k in a Uniswap V3 pool, filed CoinGecko on day one, and submitted a logo update via wallet.coinbase.com. Within 72 hours, their icon and USD price appeared in the Base app. Meanwhile, if you are preparing your submission, study the definitive CoinGecko listing guide to speed acceptance. Asset search volume rose from ~220 to ~910 daily views; swap conversion climbed from 2.1% to 5.4%. Results vary, but the playbook works when liquidity and metadata line up.
Step 1 — Contract & Verification: Before You Add Token to Coinbase Wallet
Before anything else, and before logos or price feeds, your smart contract must be clean, verified, and consistent across every surface. First, ship a standards‑compliant ERC‑20 (the fungible token interface). Next, set name, symbol, and decimals exactly as they should appear in wallets; otherwise, inconsistencies spread. Then verify the source on the explorer (Etherscan, Basescan, etc.); therefore, users and aggregators can inspect bytecode and metadata. Moreover, align explorer data with how to show price and market cap on Etherscan/BscScan so wallets reflect accurate stats.
Furthermore, prefer audited OpenZeppelin patterns. If you’re launching a stablecoin, additionally document the peg model in the README and on your website. Also add EIP‑2612 Permit (gasless approvals) to streamline DEX swapping. Meanwhile, lock privileged roles behind a timelock, multisig, or both. However—and this matters—avoid upgradeable proxies unless you absolutely need them; but if you do, publish the proxy‑admin policy. Consequently, these small choices accelerate trust in wallets and, therefore, smooth discovery later.
ERC‑20 Verification Checklist: Explorer, Symbols & Consistency
Before mainnet, run a tight checklist. First, confirm the contract is verified. Second, pin the same contract address on your website, docs, and social bios. Third, ensure matching symbol/decimals in every UI. Fourth, make max supply, minting, and pausing rules transparent. Fifth, confirm events (Transfer, Approval) emit correctly. Sixth, add links to website, whitepaper, and Twitter/X in the explorer’s socials. Collectively, this consistency reduces phishing risk and, besides, prevents duplicate entries when people try to add ERC 20 token to Coinbase Wallet by contract address. Furthermore, if metadata fields lag, use priority methods to update explorers fast and prevent confusion. Additionally, if you plan multi‑chain expansion, define the canonical chain now and publish a bridge policy early; consequently, aggregators treat wrapped versions as derivatives of the same primary asset rather than fragmented liquidity.
Stablecoin Setup: Decimals, Collateral Disclosures & Logo Package
For stablecoins, align decimals with expectations; many dollar‑denominated assets use 6 decimals, whereas most ERC‑20s use 18. Either is fine; however, inconsistency fuels display bugs and pricing mismatches later. Therefore, choose a clear name (for example, “Project USD”) instead of vague tickers. Furthermore, publish collateral, attestation cadence, and redemption mechanics in plain language. Also expose oracles only if necessary and, additionally, document failure modes. Finally, prepare a square logo (transparent PNG/SVG, 200×200 or larger) and a one‑sentence description; you will reuse both during aggregator submissions and any direct wallet metadata update. Ultimately, by nailing these fundamentals, you accelerate liquidity seeding, aggregator listing, and, thus, showing a live token price in Coinbase Wallet.
Step 2 — Liquidity That Creates Price (So Wallets Can Value You)
To actually show token price in Coinbase Wallet, you need a real market that aggregators can read. The Base app (formerly Coinbase Wallet) pulls logos and metadata from Birdeye, CoinGecko, and CoinMarketCap—but those sites won’t display a price without observable trading. Therefore, seed tradable liquidity on a tracked DEX (e.g., Uniswap v3 on Base) and pair your asset with a recognized quote (typically USDC, USDT, or WETH on the same chain). Also, for branded visibility on DEX interfaces, follow this Uniswap logo upload walkthrough so the pool looks official. Keep transfer taxes at 0% and avoid anti‑trade guards that look like honeypots. Practically, the moment your ERC‑20 is deployed, users can add ERC 20 token to the Coinbase Wallet by contract address and swap it; the logo and price follow once aggregators see your market.
DEX Liquidity Setup Matrix
Swipe left or right to view the entire table.
| Task | Why it matters | Recommended action | Target metric |
|---|---|---|---|
| Choose quote asset | Trusted quotes anchor price; therefore users see consistent valuations. | Pair with USDC, USDT, or WETH on the same chain; moreover, keep the quote dominant. | Quote ≥ 90% of volume |
| Create pool & fee tier | Right fees reduce spreads; as a result, swaps route efficiently. | Start at 0.3%; if volatility rises, then move to 1%. | Avg spread ≤ 0.6% |
| Seed initial TVL | Deeper books cut slippage; consequently new buyers convert. | Fund both sides near mid‑price so first trades stay stable. | ≤ 1% slippage on $1k swap |
| Set v3 price range | Active ranges keep liquidity working; meanwhile fees accrue. | Center at mid‑price; then allow room for normal moves. | Utilization 30–70% |
| Run test swaps | Sanity‑checks routing; therefore you catch taxes/blocks early. | Do tiny buys/sells through the app until every route succeeds. | Success; tax = 0% |
| Publish pair details | Clear links deter copycats; consequently users find the right pool. | Post pool and token addresses on your site and socials. | 1 canonical pair link |
List Token on DEX: Create Price-Forming Liquidity
Create the pool carefully on DEX. Choose a fee tier aligned with volatility (many teams start at 0.3%, moving to 1% if spreads get messy). Initialize the price near your intended peg, then set a reasonable Uniswap v3 range so makers and takers can interact without constant re‑ticks. Add enough initial TVL to survive the first day’s slippage, and make a few test swaps to confirm routing. Publish the pool and token addresses on your website and social bios to reduce impersonation risk. Aggregators compute reference prices by ingesting trades and liquidity from integrated exchanges, so a clean, discoverable pair accelerates price visibility for anyone trying to get token listed on Coinbase Wallet with full details.
List Token on CEX: Amplify Price Discovery & Trust
Although centralized exchanges aren’t required for Coinbase Wallet price display, a CEX listing can amplify price discovery, credibility, and aggregator coverage. Moreover, having your token listed on CEX, speeds up your listing on CMC and Coingecko. Prioritize exchanges like Tokpie, that are fully indexed by CoinGecko/CMC and support your chain; target a USDT/USDC order book and publish the canonical ticker/contract in the listing announcement to avoid ticker collisions. Negotiate market‑making (tight two‑sided quotes, depth at top of book), disable transfer taxes and anti‑bot rules that break deposits/withdrawals, and align token decimals with exchange limits. A liquid, verifiable CEX market reinforces your DEX pool, speeds aggregator trust, and helps users find and value your token in Coinbase Wallet. Additionally, consider listing on Tokpie Exchange to unlock tracker coverage and strengthen liquidity signals.
Prepare Applications to Coin Trackers
As trades settle, prepare applications to the most prominent coin trackers: CoinGecko and CoinMarketCap. Next, use this fast CoinMarketCap listing checklist to meet the common acceptance criteria. Include links to the verified contract and active DEX/CEX pair. CMC explicitly looks for non‑trivial trading and direct URLs to pairs; CoinGecko’s process similarly assumes verifiable markets. After a listing goes live, the Base app usually ingests your logo/metadata within ~24–48 hours; early on, your asset may display under “Newer tokens” until market cap grows (≈ $1M threshold). Keep building real volume and depth—those signals shorten aggregator review loops and make it easier to add token logo to Coinbase Wallet and show token price in the Coinbase Wallet reliably.
Step 3 — Aggregators: CoinGecko, CMC, Birdeye (Your Metadata Launchpad)
To turn a blank asset tile into a branded token with a live USD price in the Base app (formerly Coinbase Wallet), register your project with the data sources the wallet trusts. Coinbase’s guide is explicit: after you deploy, your ERC‑20 is instantly swappable, but logos, names, and descriptions are pulled from Birdeye, CoinGecko, or CoinMarketCap. Once any of these aggregators tracks your token and markets, the Base app ingests the metadata—typically within ~24–48 hours. Consequently, it helps to benchmark options with a comparison of top coin trackers before scaling submissions. So when founders ask how to add token to Coinbase Wallet, the real job is getting accurate metadata into these feeds first, then letting the wallet sync. Do it once, do it right, and you can reuse the same canonical data across chains.
Aggregator Submission Pack
Swipe left or right to view the entire table.
| Field | What to provide | Used by | Tips (with transitions) |
|---|---|---|---|
| Logo | Square PNG/SVG, ≥ 200×200 | Gecko, CMC, Birdeye | First, ensure high contrast. Next, remove text clutter. Consequently, tiles stay legible across themes. Finally, match brand colors. |
| Name / Symbol / Decimals | Exactly as on the explorer | All | First, copy values from the explorer. Then, reuse them everywhere. Otherwise, duplicates appear; consequently, users get confused. |
| Contract address(es) | Canonical chain + any secondary | All | Initially, publish the canonical chain. Additionally, list secondaries. Therefore, trackers map assets correctly and, moreover, avoid stray pages. |
| DEX pair URLs | Official, verified pairs | CMC, Birdeye | First, add the official pair. Next, confirm real volume. As a result, price feeds sync faster and, furthermore, reviews move sooner. |
| Website & docs | Project site and docs/whitepaper | All | First, align branding. Moreover, keep addresses identical. Consequently, reviewer trust improves; hence, your listing timeline shortens. |
| Socials | X, Farcaster, Discord, Telegram | All | First, pin the contract. Then, pin the DEX pair. Furthermore, refresh posts after each release; thus, discovery remains clean. |
| Stablecoin specifics | Peg model, collateral, attestations | Gecko, CMC | First, explain the peg in plain words. Next, link collateral and attestations. Therefore, risk reviewers proceed faster and, finally, users gain confidence. |
CoinGecko & CoinMarketCap: One-and-Done Token Metadata
Build a one‑and‑done metadata pack you can paste into every form: square logo (PNG/SVG, ≥200×200), name, symbol, decimals, website/docs, explorers, official X/Farcaster/Discord/Telegram, verified DEX pair URLs, and multichain addresses. CoinGecko provides a free listing path (with an optional Fast Pass for 24‑hour paid acceleration). CoinMarketCap enforces non‑trivial trading, wants direct pair links, and offers CMC Priority (paid, SLA‑backed fast‑track). In both cases, completeness and consistency speed reviews and reduce impersonation. If your stablecoin is new, highlight your peg model and collateral/disclosure cadence clearly in the submission.
Birdeye + Wallet Update: Logo & Price in Coinbase Wallet
Use Birdeye to tighten the loop. Birdeye auto‑pulls token info from CoinGecko/CMC; its optional Token Info Update Service can expedite logo/links while your primary listings propagate. In parallel, push a direct wallet update: visit your asset on wallet.coinbase.com → “Update here”, submit logo/description, and authenticate (ideally with the deployer address). Coinbase targets ~5 business days for review and recommends posting from your official X/Farcaster to verify the change. Early on, your asset may appear under “Newer tokens”; that flag usually clears after ~$1M market cap and improving liquidity. This trio—aggregators, Birdeye, and the wallet update—gets your token logo and price showing fast for anyone trying to get token listed on Coinbase Wallet with full details.
Step 4 — Direct Wallet Update: Logo & Description in 10 Minutes
Use the fastest path to add token logo to Coinbase Wallet (Base app) while aggregator listings sync. Open wallet.coinbase.com. Search your asset. Scroll down and click “Update here.” Upload a clear, square logo. Paste a short description. Submit the form from the deployer address if possible.
Coinbase aims to review updates in about five business days. Post a short proof on your official X or Farcaster to show it is you. After approval, the change appears across the Base app on desktop, mobile, and the extension. Note: this affects Coinbase Wallet only. Aggregators still control the wider ecosystem metadata. Additionally, confirm cross‑wallet readiness by reviewing Trust Wallet listing criteria explained for mobile users. This route supplements your CoinGecko/CMC/Birdeye work. It helps users recognize your token sooner while price feeds catch up.
Wallet Update Quick Map
Swipe left or right to view the entire table.
| Step | Action | Evidence to attach | Expected time | Why this step matters (with transitions) |
|---|---|---|---|---|
| 1 | First, open the token page and choose “Update here.” | — | 1–2 min | First, you start the official edit trail; consequently, reviewers can track changes. |
| 2 | Next, upload the logo and add a short description; then review. | PNG/SVG ≥ 200×200 | 3–5 min | Consequently, tiles look crisp; moreover, users recognize the asset at a glance. |
| 3 | Then, submit with the deployer address to prove control. | Signer = deployer (preferred) | ~1 min | Therefore, ownership is clear and, as a result, reviews tend to move faster. |
| 4 | Afterward, post a public proof and pin it; subsequently, link it in support. | Contract URL + screenshot | ~5 min | Furthermore, external proof reduces impersonation and, consequently, support load. |
| 5 | Finally, wait for review; meanwhile, keep liquidity active. | Ticket ID or timestamp | ~5 business days | As a result, once aggregators sync, the wallet can display price reliably and, thus, onboarding stays smooth. |
Coinbase Wallet Token Metadata Templates (Description, One-Liner, Logo)
Copy-paste bundle (use as-is, then tweak):
- Short description (≤120 chars): “{$SYMBOL} is a {stablecoin/utility} token on {Base/Ethereum} for {payments/liquidity/rewards} with transparent supply.”
- One-liner (≤240 chars): “{$SYMBOL} powers {use-case}. Contract: {0x…}. Trade: {DEX+pair URL}. Docs: {URL}. Community: {X/Discord}. Caution: crypto involves risk.”
- Logo tips: Use a square, high-res PNG/SVG with strong contrast and no text clutter. Aim for ≥200×200 px so tiles look crisp in light and dark themes. Keep symbol and decimals exactly as on the explorer. That prevents duplicate tiles after users add ERC 20 token to Coinbase Wallet by address.
Faster Coinbase Wallet Approval & Price Visibility
Founders who submit from the deployer often pass review faster. The chain of custody is clear. Post a proof link on X/Farcaster when you submit. Share your official asset link to drive users to the correct listing and cut phishing attempts.
Keep building on-chain liquidity so aggregators can stabilize your USD price. The Base app pulls that data after its next refresh, often 24–48 hours after listing. Follow a simple rhythm: update now, socialize now, price soon. This keeps momentum while you work through the longer aggregator steps that many teams ask about when searching how to add token to Coinbase Wallet.
Step 5 — QA: Make the logo, name, and price appear
First, run a clean check on a new device or, alternatively, a fresh browser profile. Next, open the Base app and search your ticker. However, if it still doesn’t appear, import it by contract address. Then confirm the symbol and decimals match the block explorer; additionally, scan for hidden typos or extra spaces. Also make sure your aggregator submissions are live; afterward, allow 24–48 hours for the data to sync with the wallet. Meanwhile, watch the asset tile. If it still shows a generic icon, submit a direct wallet‑metadata update from your token page. Prefer the deployer address; moreover, post a short proof on your official social account. Reviews usually take about five business days; therefore, be patient and avoid duplicate tickets. Besides, repeated edits can reset review queues.
Price check: show token price in Coinbase Wallet
Next, verify that your primary DEX pair is active and, furthermore, easy to find. Also confirm that aggregators are tracking trades. Early on, your token may sit under “Newer tokens”; but that flag clears as liquidity grows and market cap approaches one million dollars. If price is still missing, then ensure the pair is public, volume is above zero, and the quote asset is recognized—USDC, USDT, or WETH on the same chain. Additionally, disable transfer taxes or anti‑MEV rules that block routing. Therefore, the simple rule holds: real liquidity plus a live aggregator listing plus a short refresh window equals visible price. Likewise, MetaMask follows similar logic, as outlined in how MetaMask displays token prices. Consequently, users see USD value where they expect it.
Prevent duplicates after you add token to Coinbase Wallet
To prevent duplicates, use one canonical chain and contract across your site, docs, and bios. Furthermore, if you are multichain, designate a primary contract and then list secondaries under it. Also keep the name, symbol, and decimals exactly the same everywhere; consequently, near‑duplicate tiles won’t appear when users import by address. However, if mismatches remain after the sync window, submit another wallet update with stronger proof, and additionally include your verified DEX‑pair details in any support message. Therefore—and in practice—this sequence fixes most missing‑logo or missing‑price issues while, importantly, avoiding risky third‑party “listing services.”
When your logo and price appear, make discovery safe from phishing. Use the official asset link from the Base app. Find it on your token’s asset page and place it everywhere: site header, docs, social bios, pinned posts, and press kit. That link points users to the exact contract. Even if they later try to add token to Coinbase Wallet by hand, they will copy the right address. Encourage trading inside the Base app. Trending Swaps highlights tokens with steady activity over 24 hours, which boosts discovery and often improves in-app search rank.
Launch week plan: convert interest into installs
Run a simple five-day plan. Day-0: publish “Buy on Base” with your asset link and the verified DEX pair. Day-1: pin both on your site and socials. Day-2: post a short demo that shows how to add ERC 20 token to Coinbase Wallet using your link. Day-3: host an AMA on tokenomics and risks. Day-4: share a recap with contract, link, and pool details. Keep name, symbol, decimals, and contracts identical in every post. This steady rhythm trains search engines, aggregators, and users to trust one clear identity for your asset and reduces copycats.
Reduce friction: send via text and verify before swapping
Lower onboarding friction with Send via text. The Base app creates a claim link you can share on social channels and chats. It works well for small giveaways or refunds during beta. Recipients claim inside the app, which reinforces the correct listing and the wallet install. Today the feature favors top tokens first, with wider coverage coming. It is a growth tool, not a price source. As you distribute, remind users to check the contract on the explorer before any swap. Clean habits plus the official asset link prevent most “wrong token” mistakes and keep your growth loop healthy.
Step 7 — Growth loops and analytics
Lean on built-in discovery in the Base app. Trending Swaps highlights tokens with steady trades over the last 24 hours. Point users to your official asset link and suggest swapping inside the app. Pair this with small “send via text” drops to onboard new holders fast. Moreover, to mobilize community demand during launch week, publish on free token voting platforms that spotlight new assets. The claim link opens the app and guides the install if needed. Coverage expands over time. These tools do not replace aggregator listings. They amplify them, turning clean metadata into real discovery for founders learning how to add token to Coinbase Wallet.
Analytics: track what moves price
Instrument your launch. Use dashboards to watch trades, pairs, liquidity, and holder growth. Pull circulating supply and markets from a reliable API to confirm what the app will ingest. Remember the 24–48 hour window for metadata to refresh. Track DEX volume and swap conversion next to clicks on your asset link. This shows which channels raise price visibility in the wallet. Review these numbers daily during launch week, then weekly.
Liquidity: keep the signal strong
Adjust liquidity when spreads widen or price leaves your Uniswap v3 range. Add depth near the active tick. Use a known quote asset such as USDC, USDT, or WETH. Make the verified pair easy to find on your site and socials so aggregators attribute volume to the right market. Early on, your token may appear under “Newer tokens.” This clears as liquidity improves and market cap nears one million dollars. The rule is simple: real liquidity, clean metadata, and shareable links. Do this every week to make your add token to Coinbase Wallet work durable, not just visible.
Step 8 — Troubleshooting: fix missing logos, stale prices, and duplicates
Start with propagation reality. Even when everything is correct, metadata can lag. Give 24–48 hours after your aggregator listing goes live for the wallet catalog to refresh. If the tile still shows a generic icon, submit a direct wallet metadata update from your token’s page and use the “Update here” action. Sign with the deployer address if possible and post a short proof on your official social account. Reviews usually take about five business days. This path updates wallet metadata and often clears “no logo” issues while aggregators sync.
Price missing: stabilize the feed
Check that your tracked DEX pair is active and trading. Early on, your token may sit under “Newer tokens.” That label clears as liquidity grows and market cap approaches one million dollars. Use a recognized quote asset on the same chain. Publish the pool address on your site and socials. Turn off transfer taxes that block routing. These steps help feeds settle so the wallet can display a reliable USD price after users import by contract.
Duplicates and spoofs: enforce one source of truth
Publish one canonical contract in your site header, docs, and bios. If you are multichain, mark a primary chain and link secondaries from there. Keep the same name, symbol, and decimals everywhere. Small mismatches create near-duplicate tiles when users import by address. If issues persist after the sync window, resubmit the wallet update with stronger evidence and a deployer signature. Include verified DEX pair details in any support request. Most cases resolve once identity and market data align.
Step 9 — Compliance by design: speed reviews, lower risk
Treat compliance like product UX. Publish a short, plain-English Token Policy that explains what the asset is, who controls supply, and how changes happen. Add a clear Risk Disclosure that notes no guaranteed returns, possible losses, and any geo limits. Include a simple Brand Use guide so others do not misuse your logo while you add token logo to Coinbase Wallet and expand listings. For stablecoins, summarize the peg model, collateral locations, audit cadence, and redemption rules. Link these pages from your explorer profile, docs, and the asset view in the wallet. Clear, consistent disclosures help reviewers validate your project fast and reduce “why can’t I show token price in Coinbase Wallet yet?” tickets during the first 24–48 hours.
Operational guardrails for faster approval
Use a multisig for mint, burn, and pause roles, and list the signers. If you use an upgradeable proxy, publish your upgrade policy and a minimum timelock. Keep an incidents page with dates and on-chain refs for past fixes. Create a simple comms playbook: when you update metadata or rotate a key, post on your site and social channels, then pin the note. This audit trail builds trust in your CoinGecko/CMC filings and wallet updates. It shortens review cycles for teams learning how to add token to Coinbase Wallet with full branding. Good process beats speed hacks and scales across new chains and integrations.
Data and privacy basics
Collect the least personal data you can in airdrops and early access forms. If you use claim links or referrals, state what you track, where you store it, and how long you keep it. Offer a “report phish” address and a ready-to-send template. Maintain a public contract registry with your canonical addresses, DEX pairs, and supported chains. When users add ERC 20 token to Coinbase Wallet by contract, they should see the same data they saw in your docs. Consistency lowers fraud risk, improves aggregator mapping, and prevents stray look-alike tiles in search.
Step 10 — COINBASE‑READY launch checklist
First, use this compact checklist before every release; consequently, your how to add token to Coinbase Wallet work stays clean and avoids last‑minute fixes. Additionally, follow the sequence below so tasks line up logically and, therefore, reviewers and users encounter fewer issues.
- First, contracts: verified source; also, correct name/symbol/decimals; furthermore, roles on multisig; and, additionally, the proxy policy published.
- Next, liquidity: live Uniswap v3 pair on the right chain; moreover, a known quote asset; besides, a tight initial range; and, importantly, no transfer taxes.
- Then, aggregators: fresh CoinGecko and CMC forms with pair URLs; additionally, socials and explorer links aligned; therefore, listings process faster.
- After that, wallet update: logo and description submitted via the “Update here” action; consequently, branding appears sooner.
- Also, distribution: share the official asset link everywhere and, furthermore, pin it across channels.
- Additionally, analytics: watch Birdeye, CoinGecko API, swap conversion, and site clicks; therefore, you can double down on what works.
- Finally, comms: post short verification threads on X or Farcaster; besides, keep them pinned so support can reference them.
Green‑light test: show token price in Coinbase Wallet fast
Before you announce, run a simple yet decisive test. First, can a new user find your ticker; however, if not, can they add ERC‑20 by address and still see the logo; and, therefore, see price within two taps? Next, can they reach the verified pool from your site in one click; additionally, do explorers, docs, and bios all show the same contract? If any answer is no, then fix that item first. Afterwards, drive users through the official asset link and, consequently, measure conversion by channel. Therefore, you avoid fragmented discovery and, furthermore, reduce support tickets in week one. Also, hardware‑wallet holders can verify consistency via a quick Trezor asset‑list guide for cold‑storage support.
90‑day plan: scale Coinbase Wallet visibility
As momentum grows, shift to a steady rhythm; moreover, make improvements predictable. First, rebalance your Uniswap v3 range monthly; additionally, if you run a stablecoin, publish monthly attestations. Next, add one new distribution surface each sprint; then, ship a short “how to add stablecoin to Coinbase Wallet” guide and, besides, localize it for your top languages. Furthermore, consider a Tokpie Exchange listing to deepen order‑book volume while your DEX pool anchors on‑chain price; therefore, aggregator confidence improves and, however volatile markets become, overall swings soften. Ultimately, keep tightening this loop and, consequently, your “get token listed on Coinbase Wallet” play remains reliable, repeatable, and scalable. In addition, teams comparing wallet integrations can use this complete guide to adding a token to OKX Wallet to understand how explorer data, liquidity, and security checks affect discovery.